

Scheduling Report Emails
Open Scheduling in your account to see everything that is scheduled. Check Show Scheduled Emails to list your scheduled emails (the other checkboxes show data source refreshes, cache updates and sequences). Scroll to find the email you want to change, or add a new one. A data source also has a shortcut that shows its scheduled emails, which you can click.
To add a new email, click the Add button. Choose Add Report Delivery to send one report, or Add Multi-Report/Dashboard Delivery to send more than one report or a dashboard. The same menu also adds cache refreshes, sequences, data source copies, integrations and dashboard links.
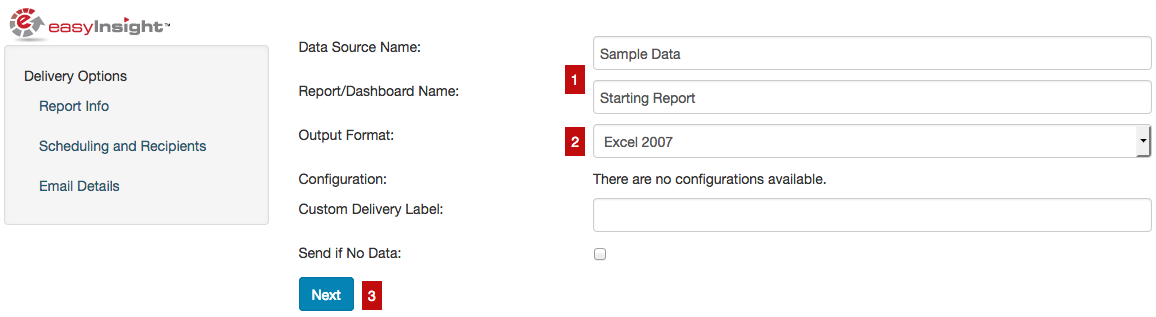
First, choose what to send and how:
1
Select Data Source - choose the data source that contains your report
2
Select Report - choose the report itself
3
Output Format - choose Excel 2007, Excel 2003, PNG, PDF, HTML Table, Inline PNG, or CSV. Slack is also in the list for accounts that have turned it on in the Integrations page
4
Customize Filters - off by default. Select the data source and report first, then turn it on to filter the report. Learn more about Customize Filters by any of the dates, dimensions or metrics on the report. One report with different filters can replace many copies of the same report. Filters apply data level security too, so if you filter by Deal Author and send the email to everyone, each person receives only their own deals
5
Custom Label - optional. Enter a label to show on the scheduling list instead of the report name, for example Won Deals WTD, MTD or YTD
6
Send if No Data - check this box to send the email even when the report has no data. By default, a report with no data is not sent
7
Next - click on Next to proceed to the next step of configuration
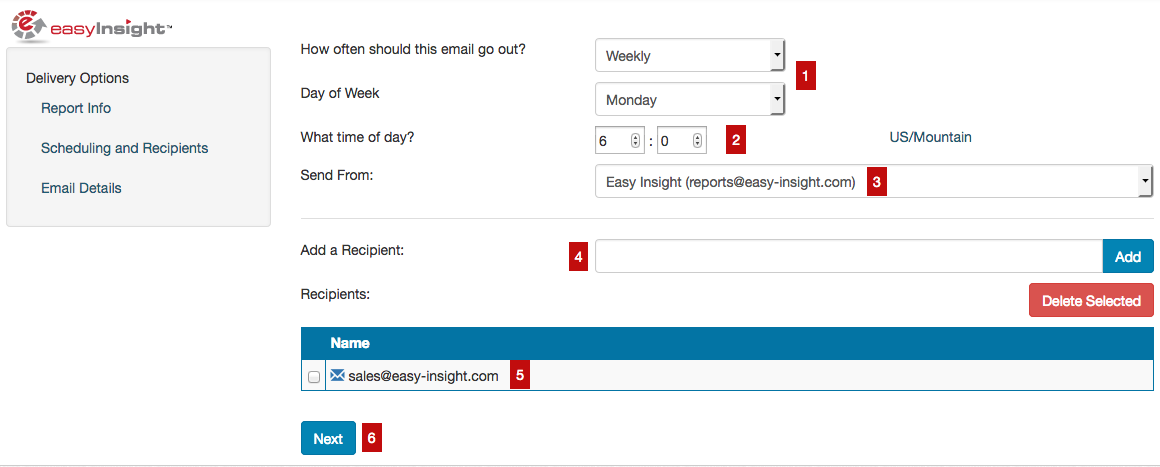
Next, choose when the email goes out and who gets it:
1
Frequency - choose Daily, Weekly, Monthly, Weekdays, Monday/Wednesday/Friday, or Tuesday/Thursday
2
Time and time zone - choose the time the email goes out and the time zone it is based on
3
Send from - emails go out from reports@easy-insight.com by default. On Enterprise plans and above you can send from your own address once your domain is authenticated with Easy Insight. To set that up, contact support@easy-insight.com for the authentication steps. Sending from your own address without authentication is not recommended: the email shows as sent "via" Easy Insight and is likely to go to spam
4
Add recipients - users in your account are listed for you to pick. You can also add email addresses, or Easy Insight groups to send to everyone in the group
5
Manage recipients - this list shows everyone currently on the email. Select people with the checkbox and click Delete Selected to remove them from the email
6
Next - click on Next to proceed to the last configuration step
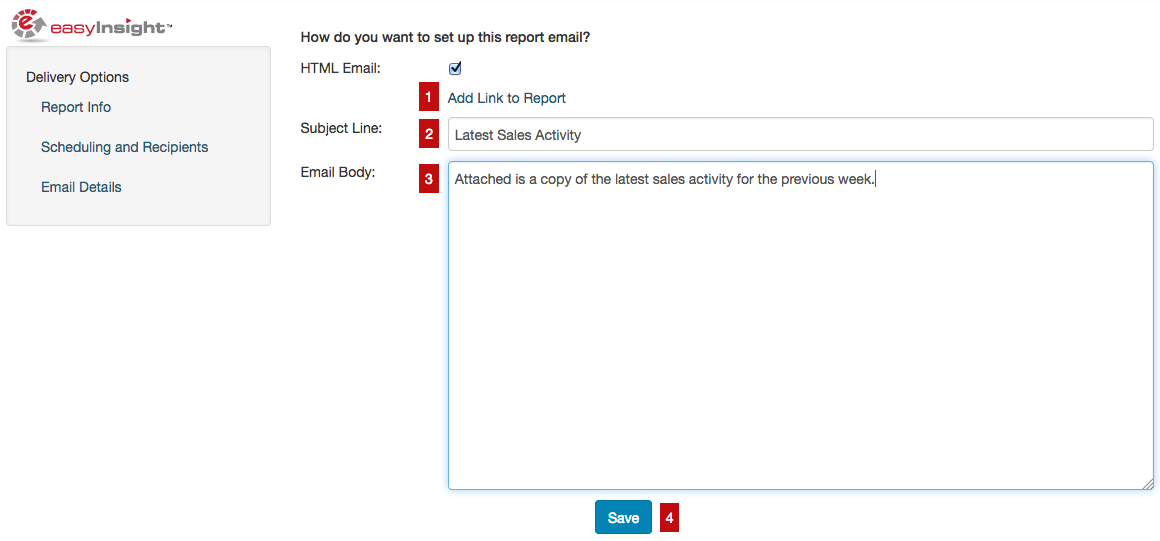
Finally, set up the email itself:
1
HTML Email - on by default. Turn it off to send a plain email
2
Add link to report - click this link to insert a link to the report back in Easy Insight into the email body
3
Subject - enter a subject line for the email
4
Body - add any text you want to appear before the report. You can use HTML tags such as <br> for a line break, and you can insert a filter value by putting its name in {[ ]}. For example, Hi Bob, check out {[Deal Author]}'s sales shows the Deal Author filter value in the email
5
Save - creates and schedules the email!
To change, stop or reuse a scheduled email, find it on the Scheduling list (check Show Scheduled Emails) and open it:
1
Edit - change any setting, then Save
2
Pause or stop - set the schedule to Never (disabled). The email stays on your list but stops sending, so you can turn it back on later
3
Delete - delete the email to remove it for good
4
Copy - copy an email to send the same email with a different set of filters, such as month to date (MTD) or lost deals, without building it again